| Tip |
|---|
COURSE DESCRIPTION In this course, you will learn how to make and process Card Orders in NCDB – this is the way how for example schools/universities often order cards for their students. Some universities issue cards on their own; for these, the information read our course “How to work with external card issuers” You will know how the whole process of NCDB Orders runs – from the moment the Order is created to the moment the cards are sent to Personalization Center. As prerequisities to this course, please take a look at our other courses “How to understand Serial Ranges” |
...
When creating new Card Issuer, all mandatory fields (address etc.) have to be filled. Beside Besides that, it is necessary to select some checkboxes to allow the Card Issuer to make cards. These checkboxes are listed below and they are also marked in the picture.
...
If you want to choose an existing Card Holder, the system offers you (in the next step) the list of all Card Holders. The cardholders can be added using the green “plus” button and removed using the red “minus” button. When all Card Holders are added, click “Add selected entries” button.
...
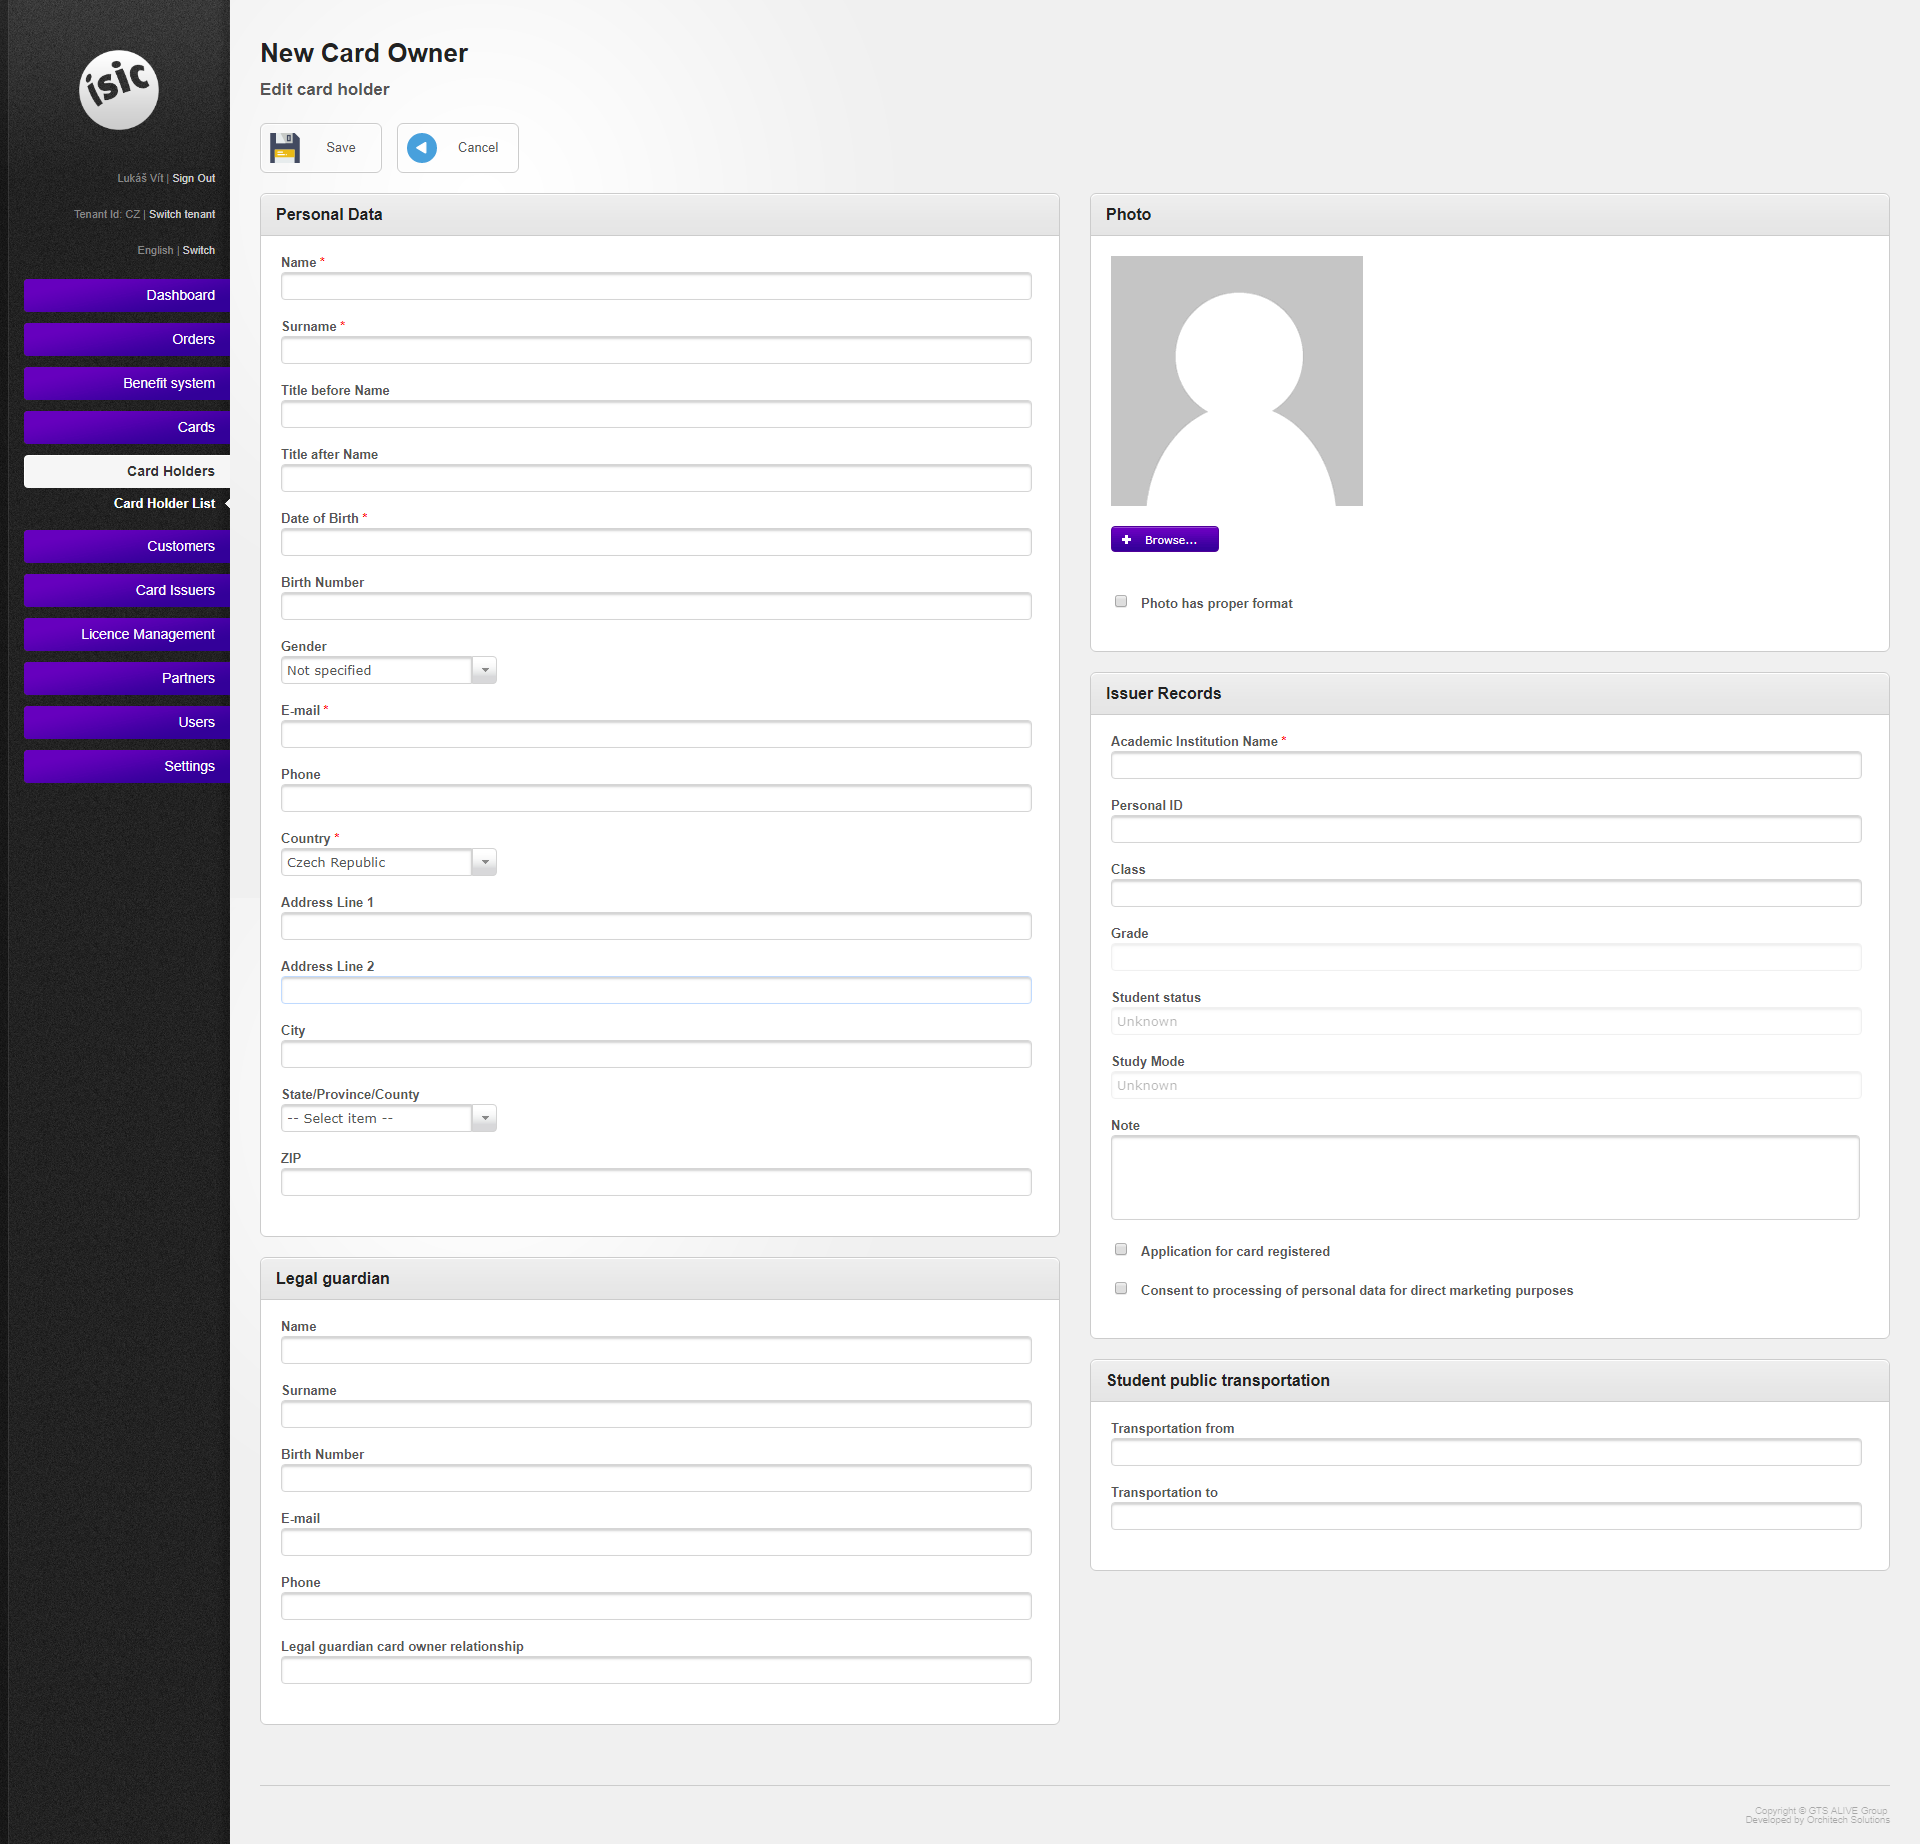
If you want to select a person who is not in the database, choose “Create a new card holder” option. Into new Card Holder’s profile, fill all mandatory information (marked with red asterisk) and upload a photo in .jpg format. It is also possible to leave the photo blank and upload it afterwards. If you are sure that the photo is already in proper format, select the checkbox “Photo has proper format”.
| Note |
|---|
Important note: Don’t forget to save your new Card Holder! |
...
Great possibility is to make the order using the bulk import. This can be an advantage for schools or universities that want to make order for tens or hundreds of students at the same time and adding students one by one (as described in the previous section) would be extremely time-consuming. To do the import this way, at the beginning of the “New Order Wizard”, choose “Import order from XLS(X) file” (see the picture below).
...
Before importing the excel file, it is a good idea to have a look at the detailed information hidden under the question mark icon in the top right corner. Under this icon, you will find detailed help about the format of the excel file and you can download the sample import file. Downloading this sample file and putting your own data into it is probably the easiest way how to avoid errors while uploading. Very important is the column called “Request Type”, where the type of the item you want to order is defined. Some values for this field are listed below, for description in more detail, please see the help under the described question mark. Request type:
...
If the Card Issuer doesn’t have this possibility allowed, but the order is virtual card only, it is necessary to press “Process Order” buttton button (see picture below). In the window that appears, click “Prepare for processing” button.
...